RXNT Scheduler Solution offers an appointment import with each new enrollment at no additional cost. Load your new RXNT Scheduler account with appointments from your legacy system. Simply follow the steps below to get started.
Get started
Format your file
- Download the appointment import template attached at bottom of this article.
- Load your data elements into the template.
- Copy the data into the respective columns of the template or import the data into the CSV file template.
The following fields are required:
-
- Appointment Status
- Appointment Location
- Appointment Type
- Appointment Start Date
- Appointment Start Time
- Appointment End Date
- Appointment End Time
- Patient Reference ID
- Person Resource
Send files to RXNT
- Use the “Send File” feature on the product dashboard to attach the CSV file.
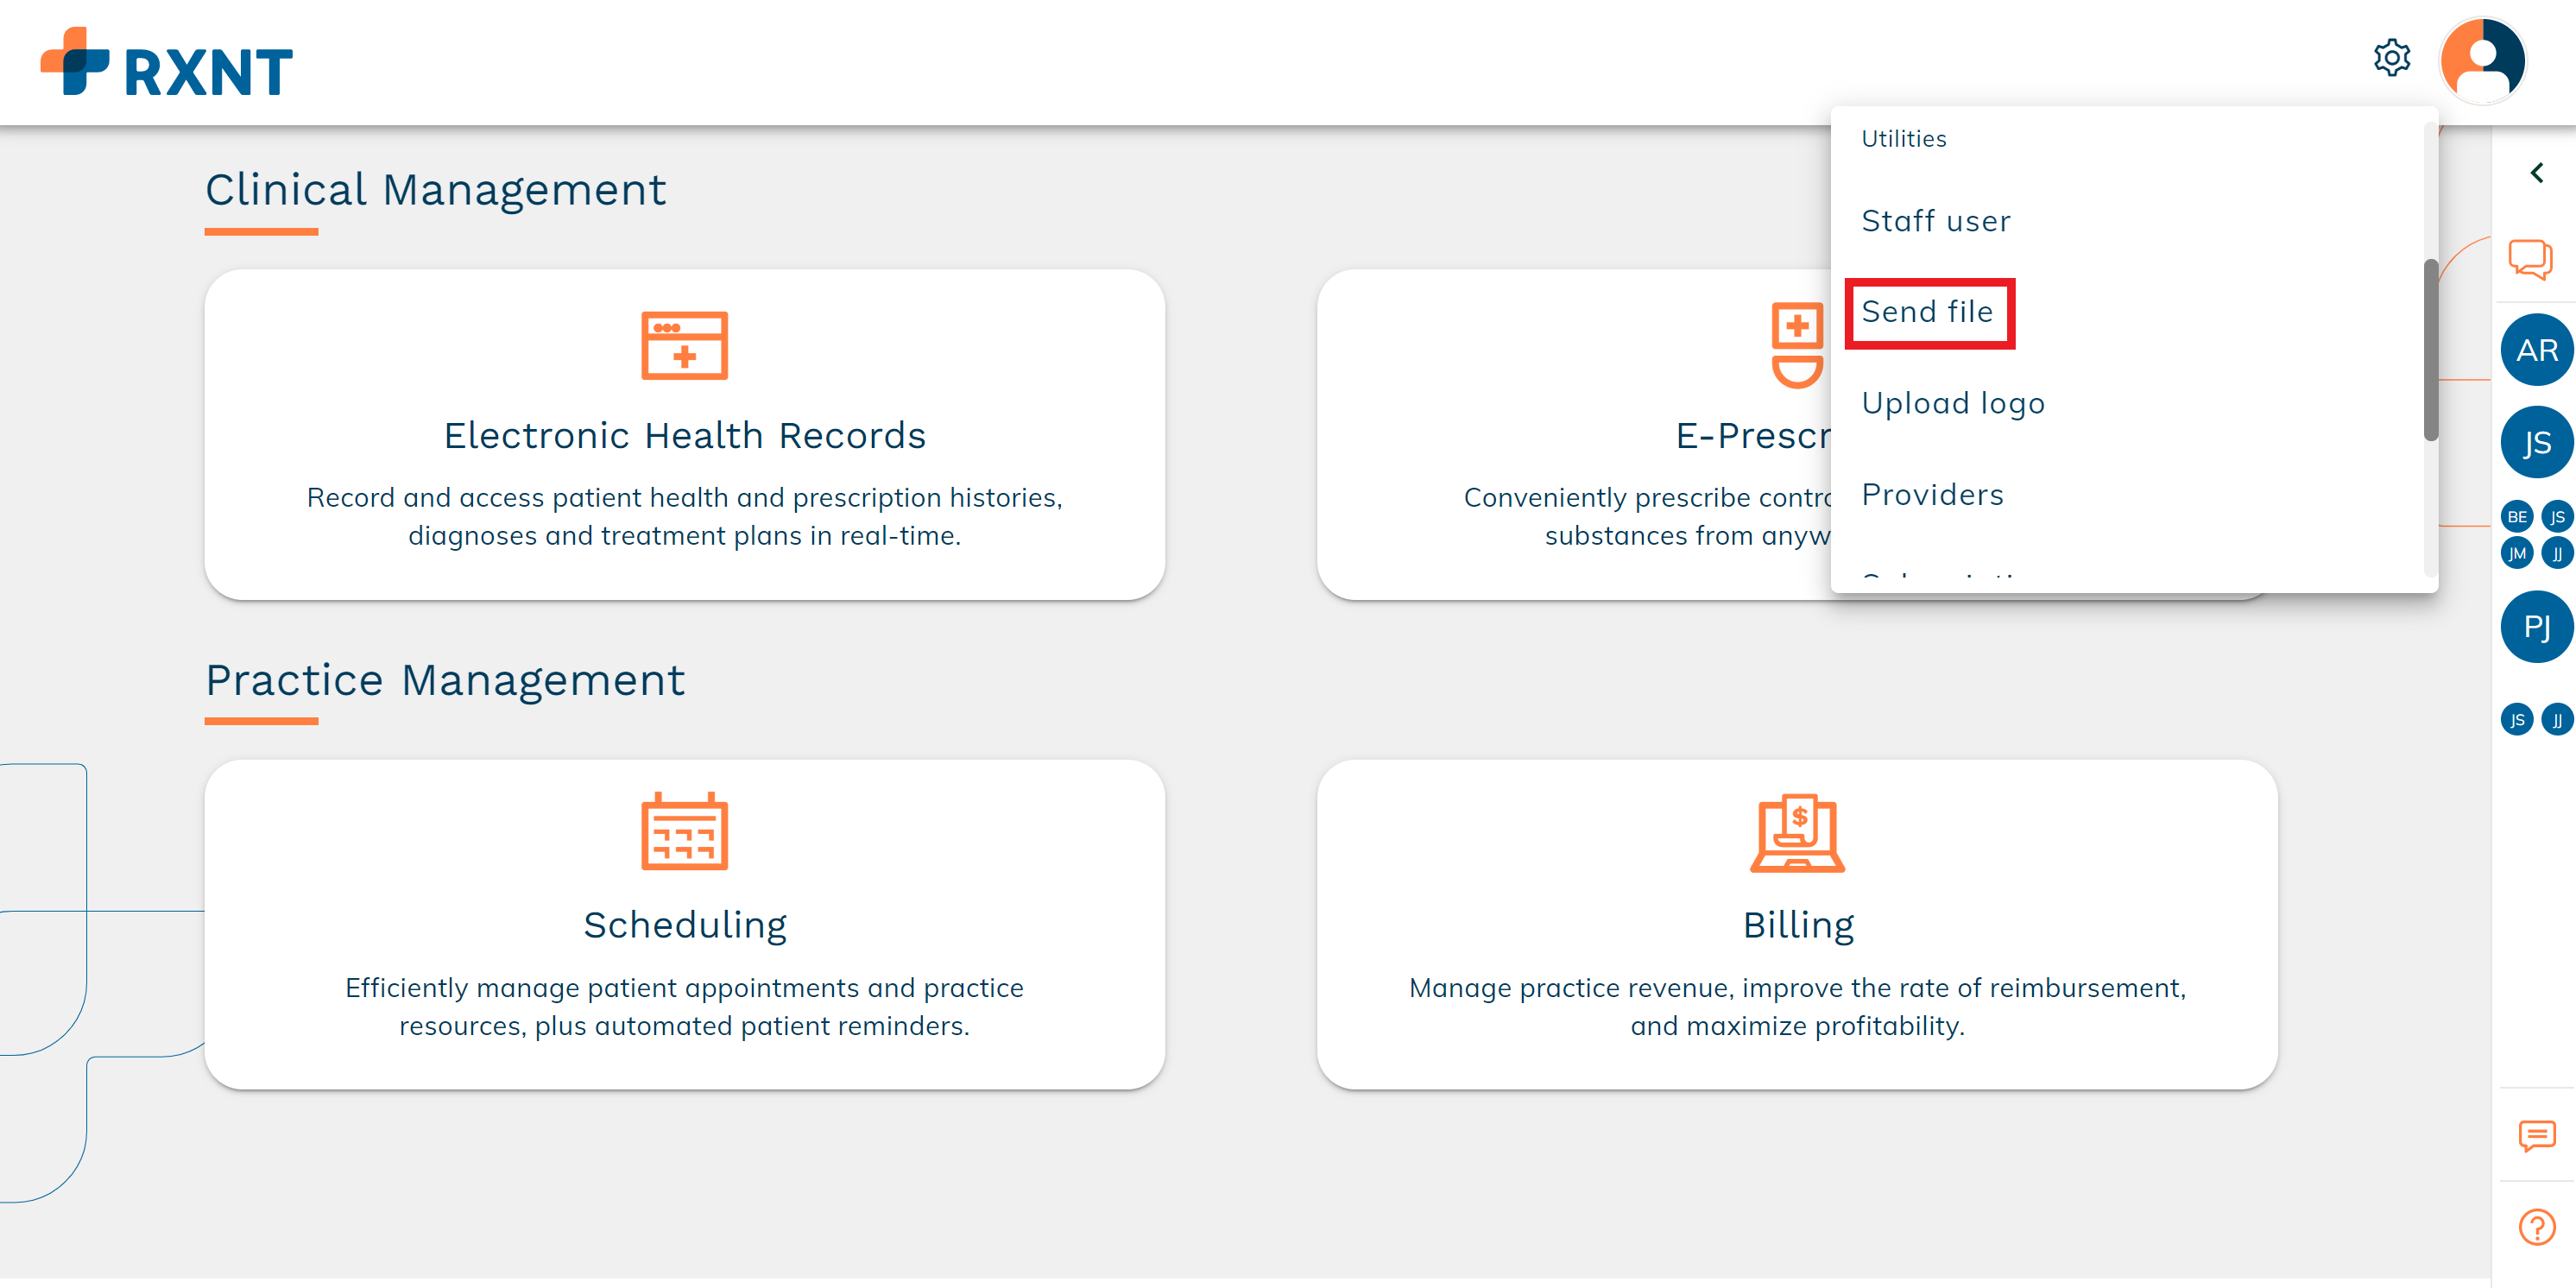
- Login to RXNT.com

- Click Utilities

- Click Send File
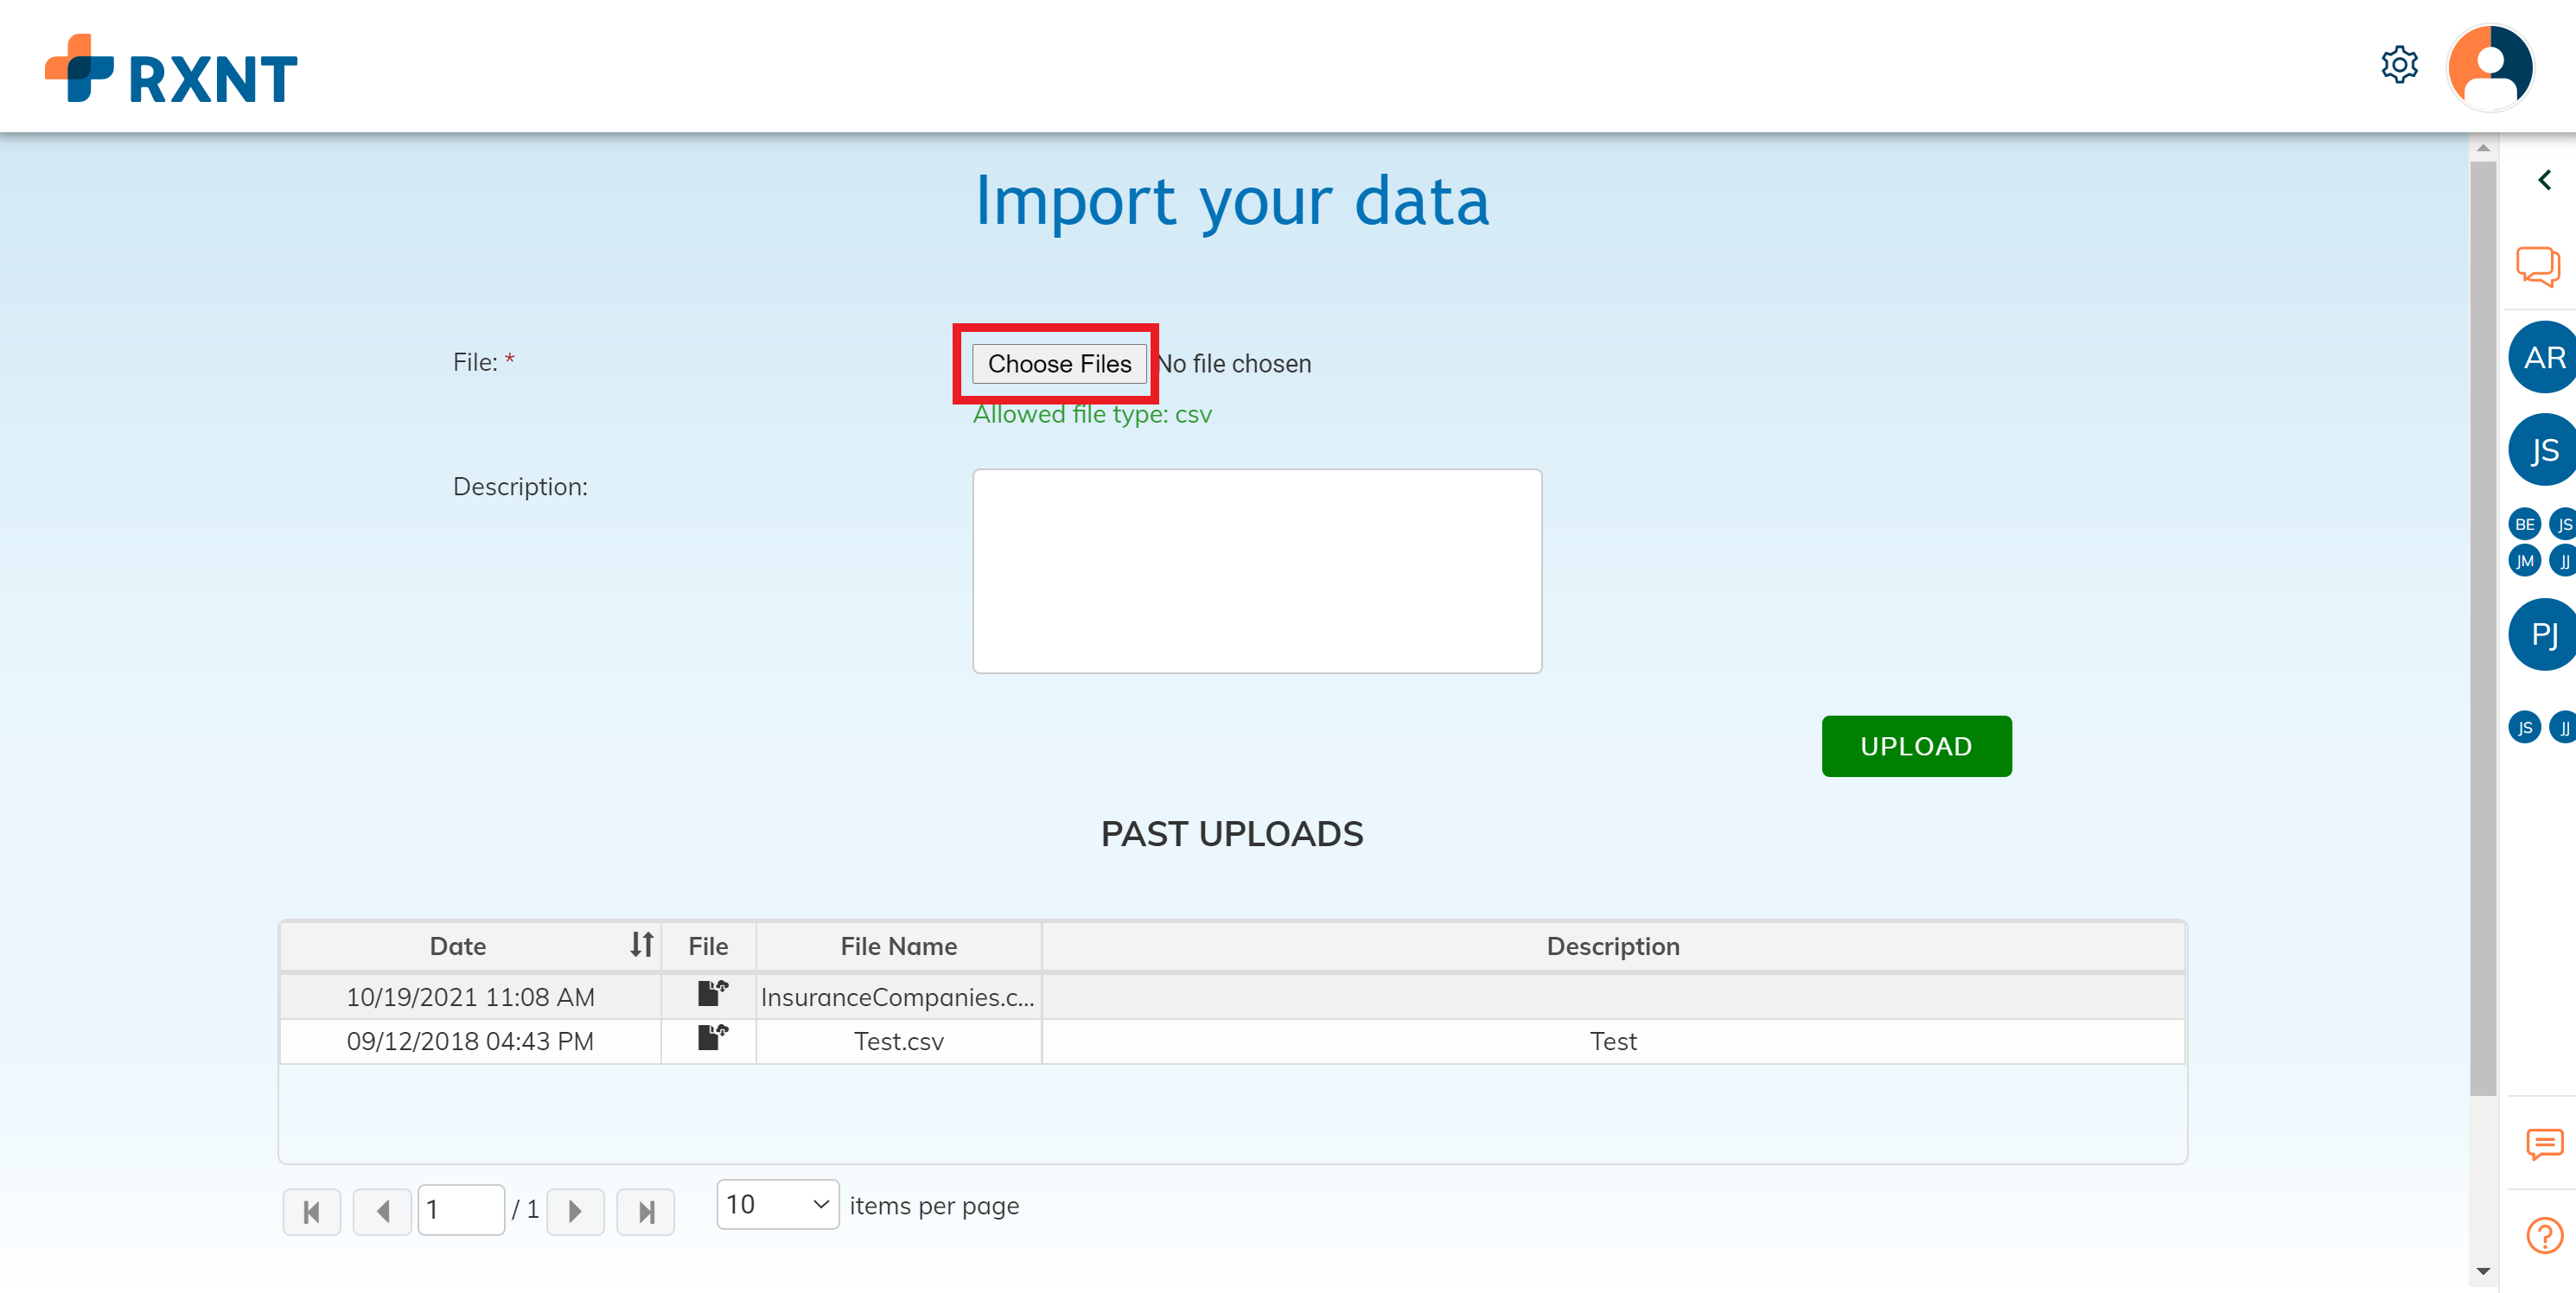
- Click Choose Files
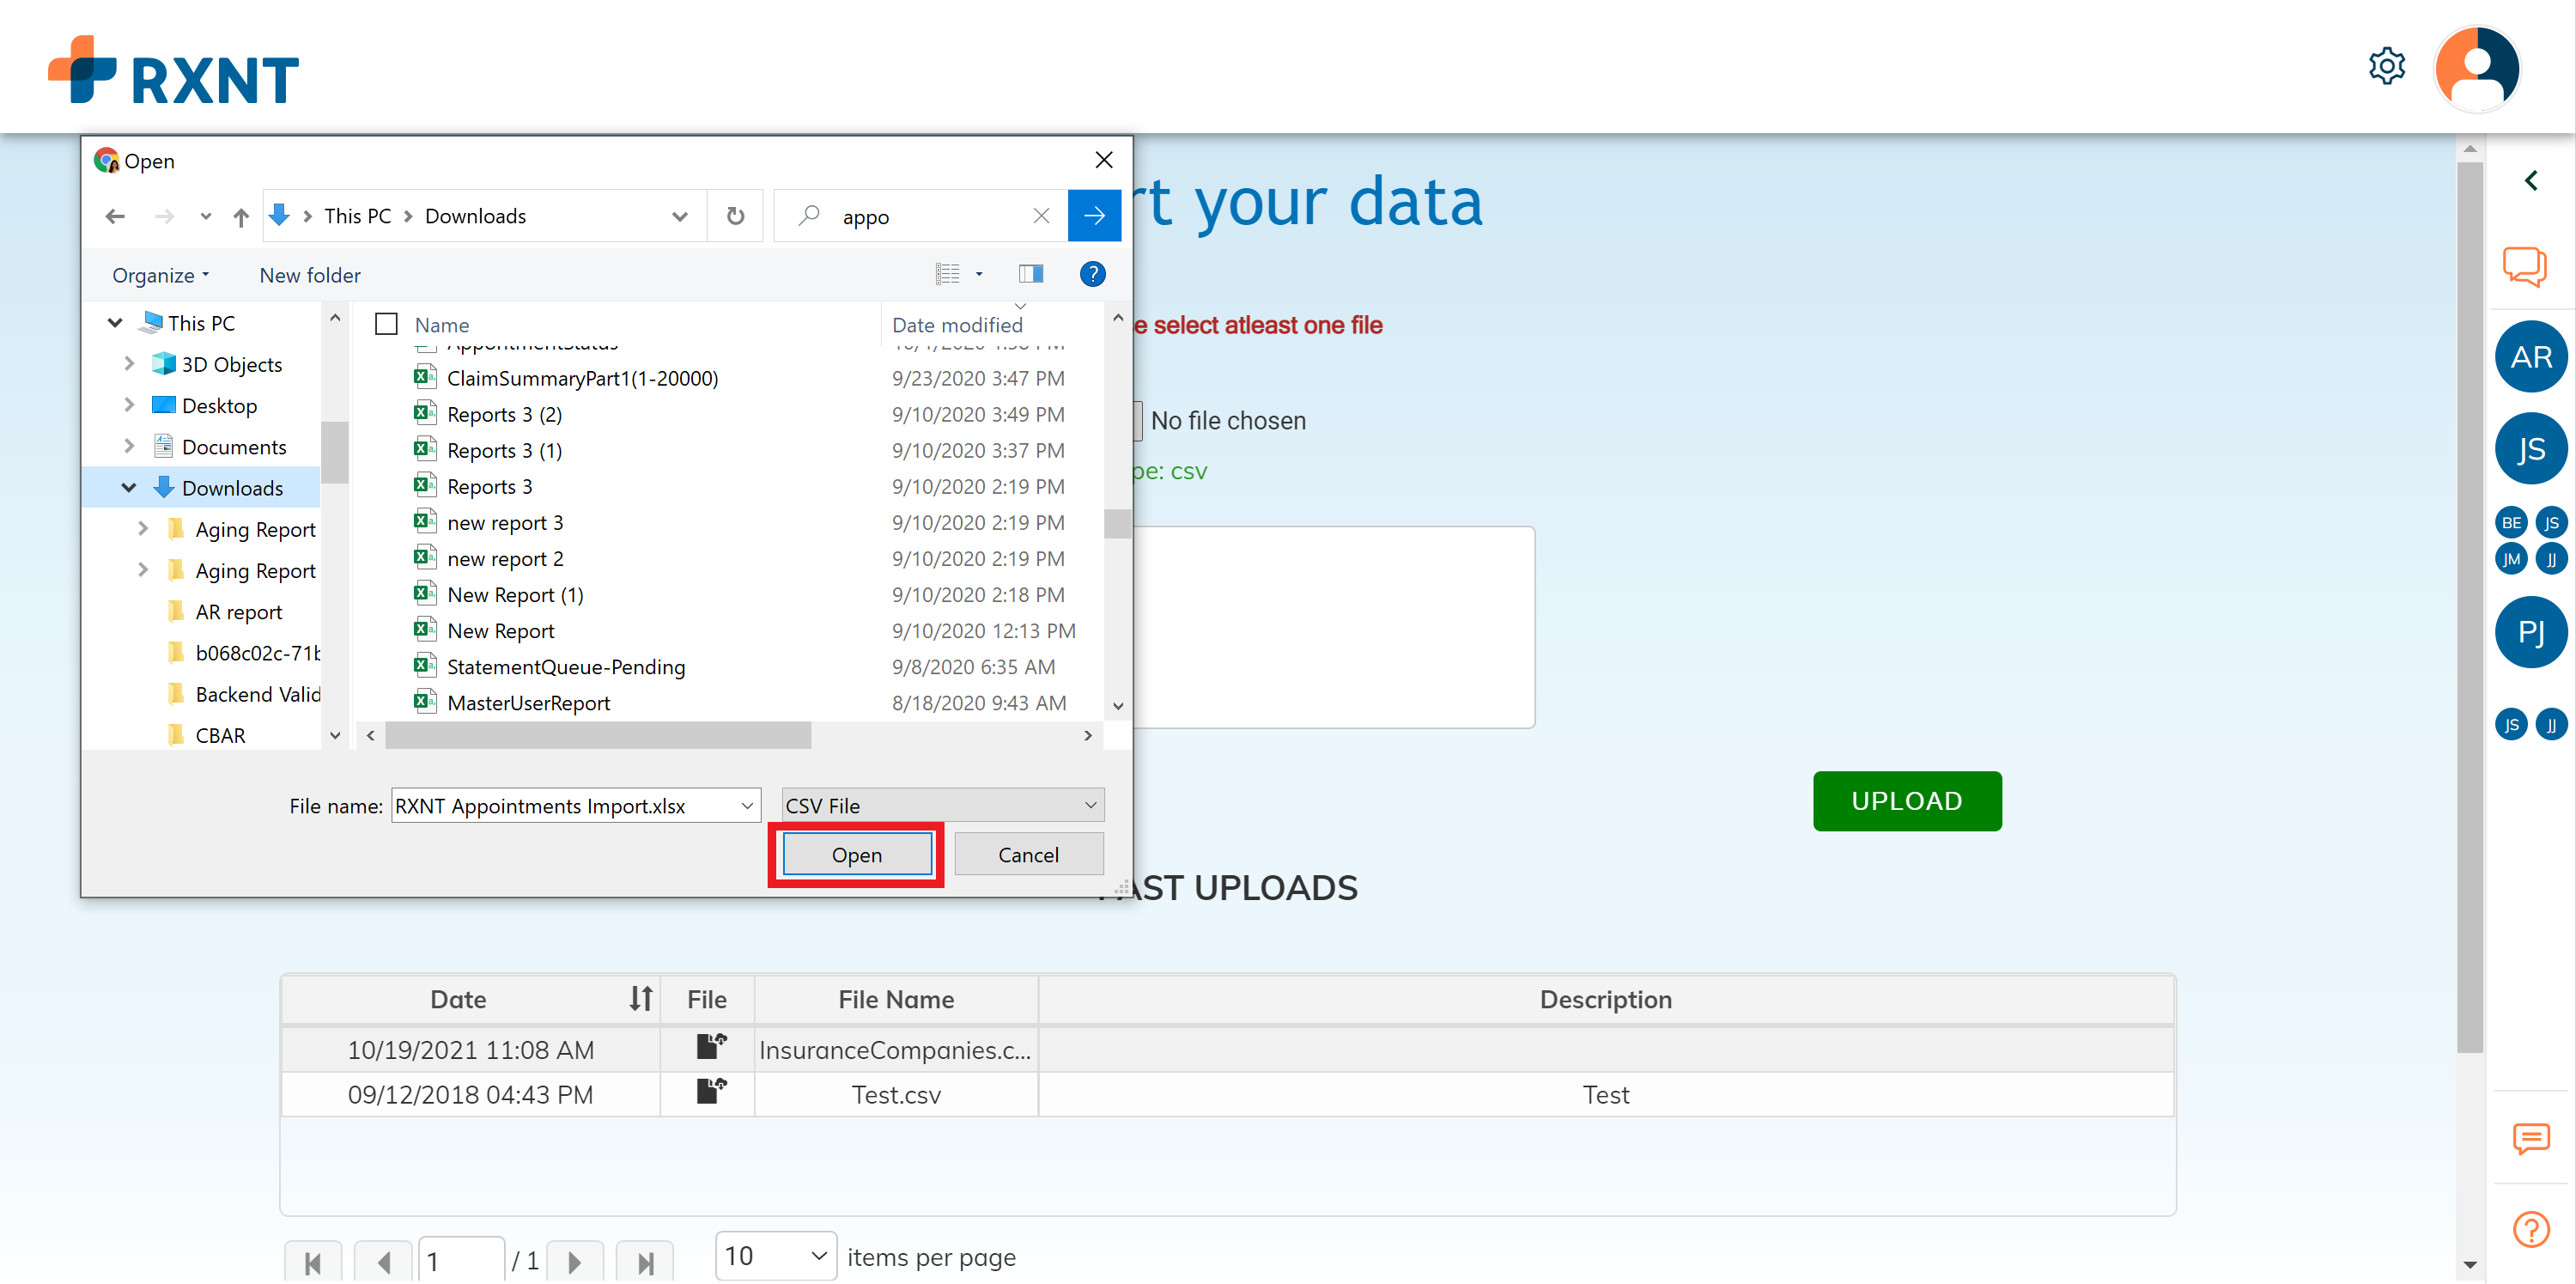
- Browse to the appropriate file, select it, and click Open to add it to the upload tool.
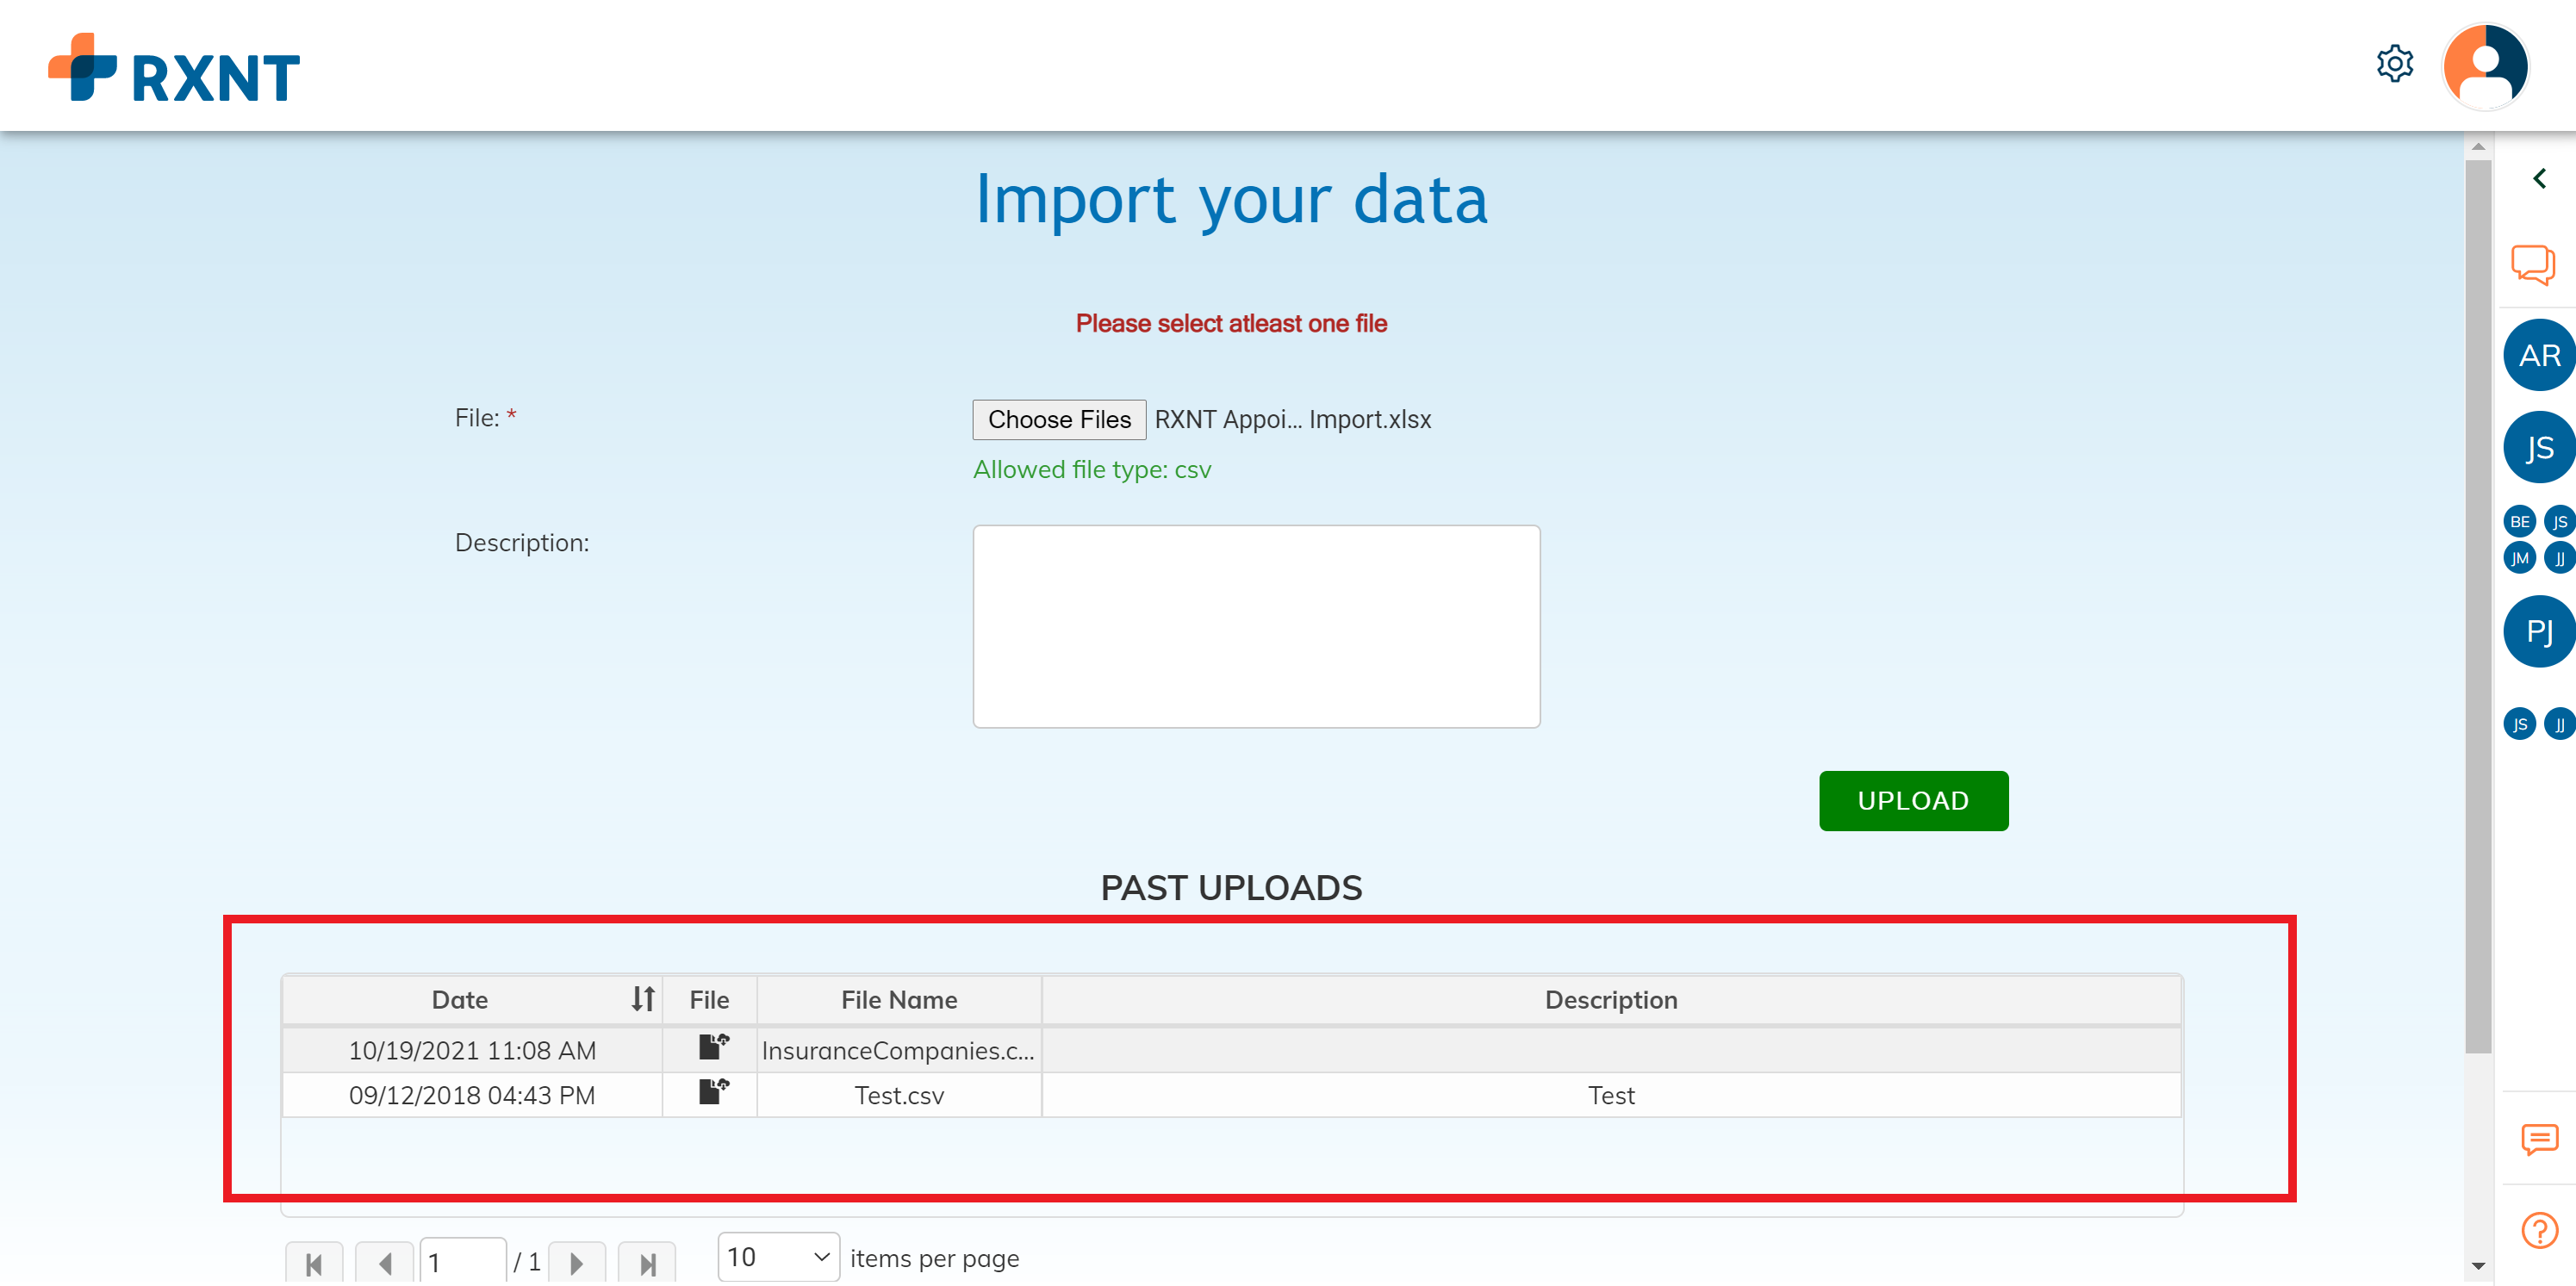
- Add a description for the file (optional), and click Upload to send the file to our integration team who will be automatically notified and begin processing your import.

- Uploaded files will appear in the Past Uploads list at the bottom of the screen.
Data Import
- Once you have uploaded the file into RXNT, we will automatically be notified. The import is not instantaneous and will take about 1-2 weeks to import into your database. Once your import is complete, you will receive a notification from an RXNT Team Member.