Favorite a procedure code
These codes represent the medical procedures carried out during a patient's visit or treatment. They offer precise details about the specific actions taken by the healthcare provider.
Before a procedure code can be added to encounters, it must first be saved as a favorite.
Click Utilities.
Click Practice Setup, then select Procedure Codes.
All procedure codes originate from the American Medical Association AMA. These codes are permanent and cannot be removed from the system.
Deselect Only Favorite Records.
To search for a procedure code, you can enter the code into the Code field or provide a brief description in the Description field.
Click the hollow Heart icon to favorite.
Click on the Procedure Code to Save the Charge Transaction Code screen. This will enable you to associate the CPT code with fee schedules.
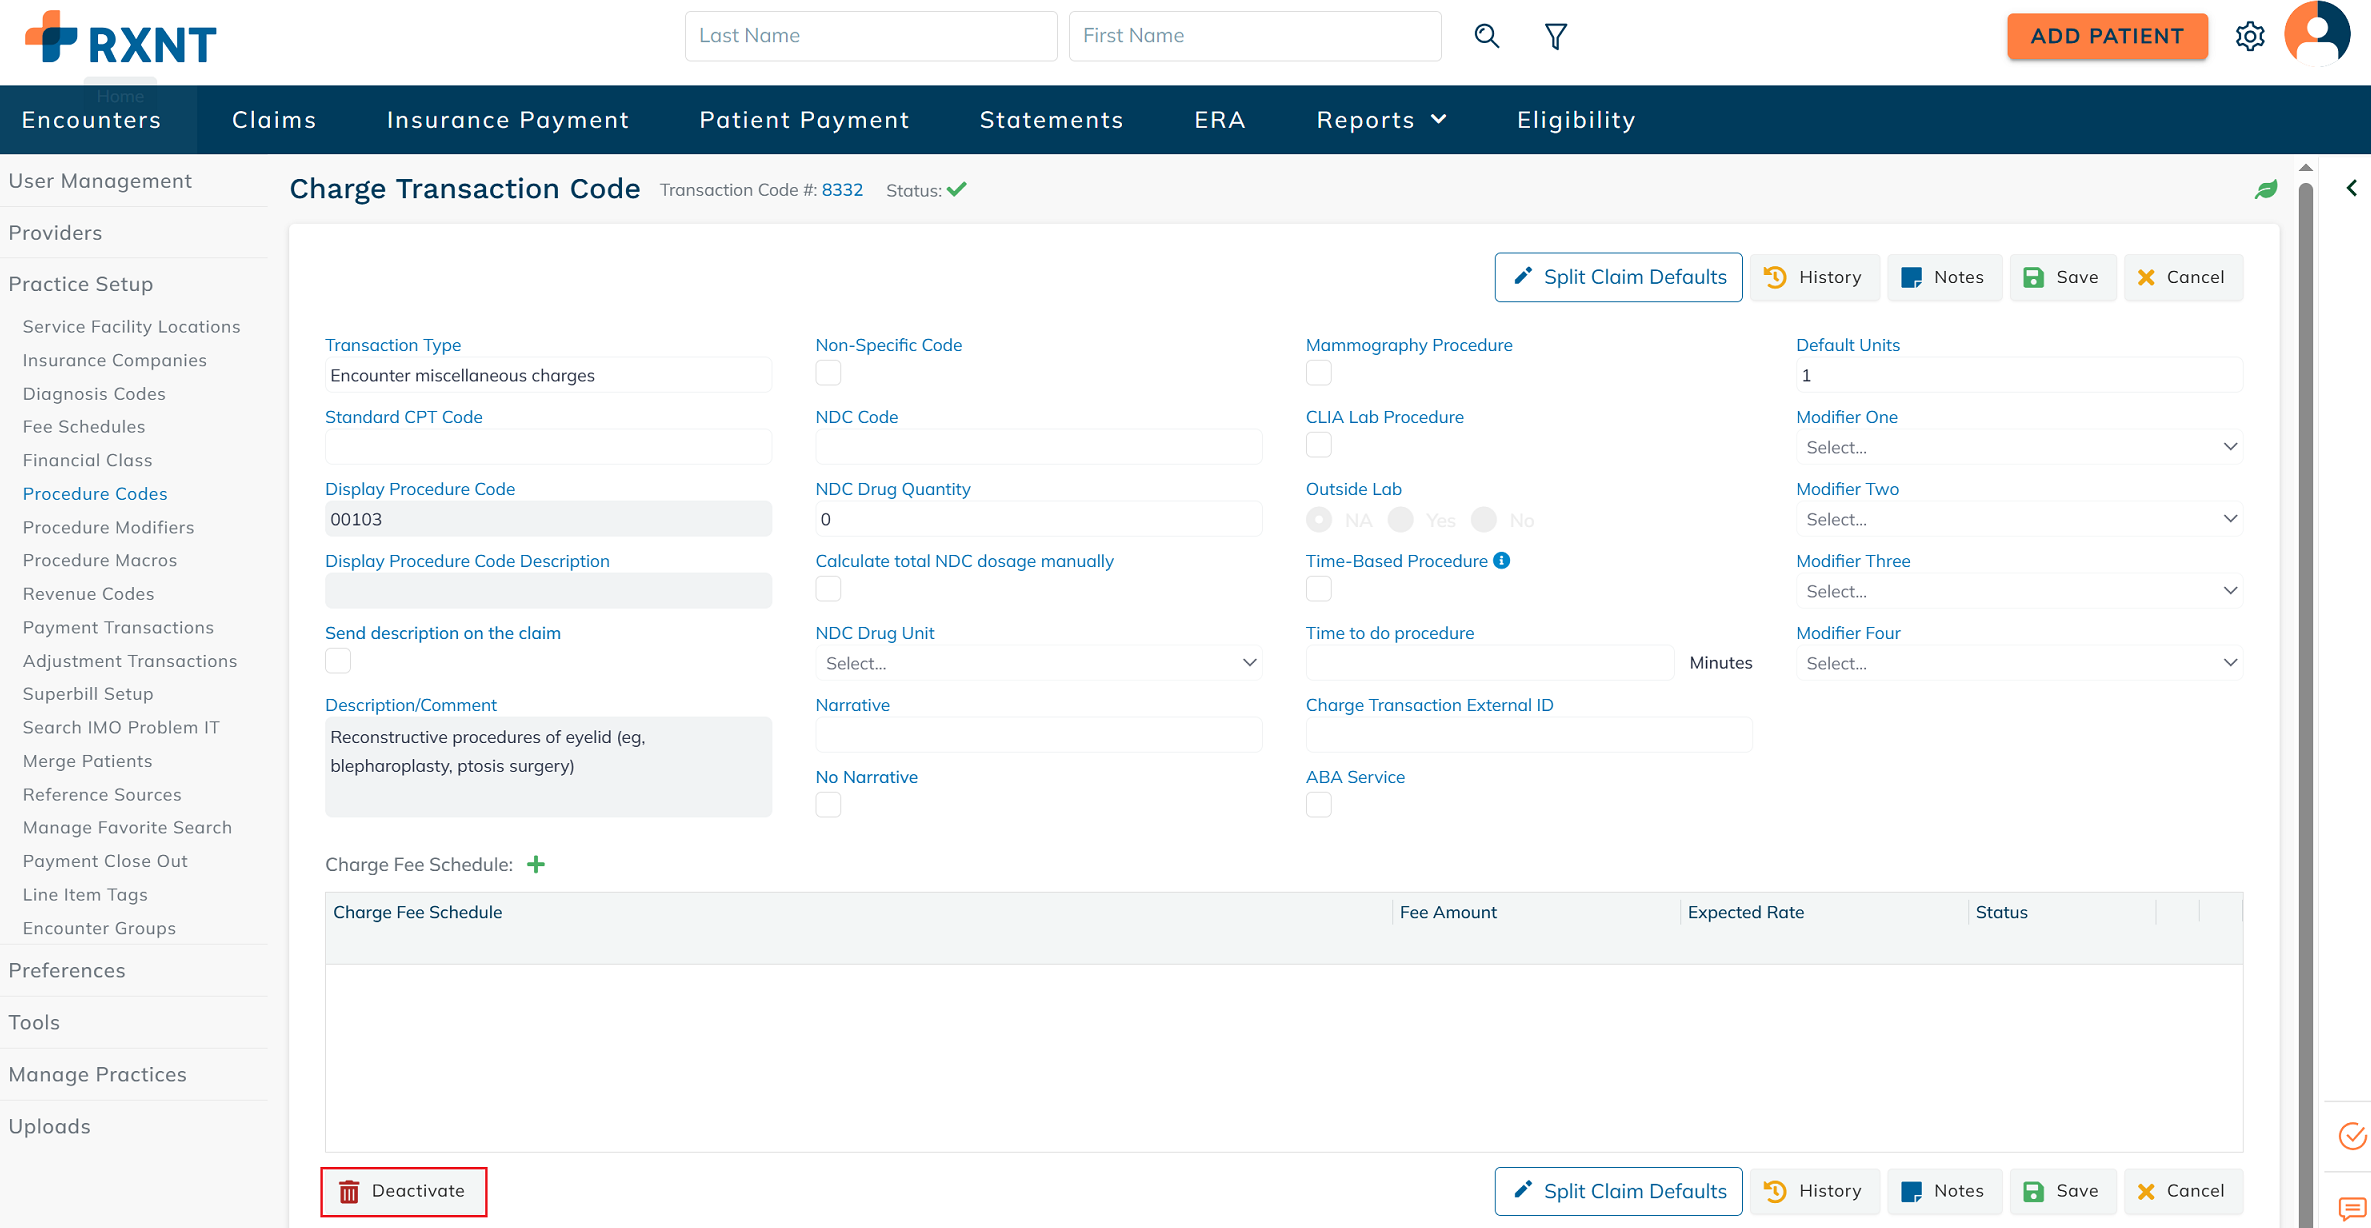
Charge transactions code screen
In the Charge Transaction Code screen, you have the flexibility to personalize your procedure codes by setting default values and adding additional details that should be attached to the code. This screen allows you to configure important elements, including updating the displayed procedure codes and descriptions, linking fee schedules, setting default modifiers, units and more.
To update the Displayed Procedure Code and Displayed Procedure Code Description fields, simply type directly into the respective field. The Displayed Procedure Code details you enter here will appear in the encounter procedure code dropdown menu, alongside the standard CPT Code description.
The details entered in the Display Procedure Code Description field can be displayed on the CMS 1500 claim form by selecting the Send description on the claim checkbox. Keep in mind that selecting this option will automatically check the No Narrative box. Once this is set, every time this procedure code is used in an encounter, the corresponding description will appear in the shaded area of the line item on printed claims, as well as in the relevant EDI segments.
You can choose to enter details in the Description/Comment section, however, these details will only be visible within this specific charge transaction code screen.
If this code is designated as a Non-Specific Code, simply check the checkbox. You also have the option to enter the NDC Code along with any additional details.
If this CPT code corresponds to a Mammography Procedure, CLIA Lab Procedure, Time-Based Procedure, or ABA Service, select the appropriate checkbox. Additionally, if the procedure was performed at an outside lab, click the corresponding button. If applicable, be sure to enter the Time to do procedure as well.
Additionally, you can set default values for Units and Modifiers, and link any previously created Fee Schedules. To do so, click the green (+) button and select the desired fee schedule from the dropdown menu. Click here to learn more about Fee Schedules!
To duplicate a procedure code, return to the Procedure Codes screen and click the blue (+) button.
Miscellaneous charges
Click Miscellaneous Charges.
To add a miscellaneous charge, click + New Miscellaneous Charges.
Enter the name or code for the miscellaneous charge in the Display Procedure Code field. Then, provide a description in the Display Procedure Code Description field. If applicable, include any comments or additional details in the Description/Comment section.
To link a Fee Schedule to the miscellaneous charge, click the green (+) icon and select the appropriate fee schedule from the dropdown menu. The associated fee amount will automatically populate in the Fee Amount field. If no amount is displayed, you may manually enter the fee in the Fee Amount field.
Click Save.
Miscellaneous charges that are not assigned to an encounter or payment can be deleted.
When a Miscellaneous Charge is linked to a patient's account, the Delete option becomes unavailable. Instead, you can Deactivate the miscellaneous charge by clicking the Deactivate button on the bottom left side.
 Favorite a diagnosis code
These codes represent the medical conditions or illnesses affecting the patient. They help healthcare professionals understand the patient's health status and the reasons for seeking medical care.
When adding diagnosis codes to encounters, those marked as favorites will be conveniently positioned at the beginning of the dropdown list for easy access and selection.
Click Utilities.
Click Practice Setup, then select Diagnosis Codes.
All Diagnosis Codes come from IMO and cannot be deleted.
Deselect Only Favorite Records.
Enter the specific diagnosis code into the Quick Code Search field and click Search.
To search for diagnosis codes by description, input the description into the Description field, and click Search.
You can use the Advanced Code Search field to narrow your search for the appropriate code. Enter a keyword or diagnosis code into the field and click Search.
Click the hollow Heart icon to favorite.
Add a revenue code
In a hospital setting, these codes facilitate billing and reimbursement for the services rendered. The Revenue Code provides an indication to insurance companies regarding the location where a medical procedure took place, such as the emergency room, operating room, or another department within the facility.
Click Utilities.
Click Practice Setup, then select Revenue Codes.
Click +New Revenue Codes.
Enter the revenue code in the Master Revenue Code field and select it from the dropdown menu.
Select the Master Revenue Code Subcategories.
Click Save.
Still need help? Contact us!
Have a great idea? Tell us about it!